[ Back |
Fine grinding |
Polishing ]
Grinding the mirror
(A like story can be found at
http://www.jlc.net/~force5/Astro/ATM/MirrorMaking/Grinding.html;
lots of pictures also at http://tull.umassp.edu/~ggallo/optic/starz1.htm).
For the mirror, I had a look (we write Monday evening 22-nov-1999) at the
VSRUG, who have a mirror
grinding workgroup. The friendly man there sold me two glass disks at
1500 fr. each. Their diameter is 145 mm and their thickness is 23 mm.
One side, the side we'll grind, is flat. The other side has a number
of concentric grooves. I don't know why they are there, maybe it's easier
to manufacture them that way.


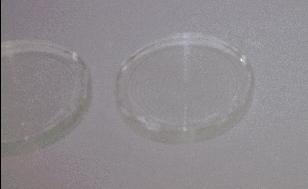
The fresh glass disks
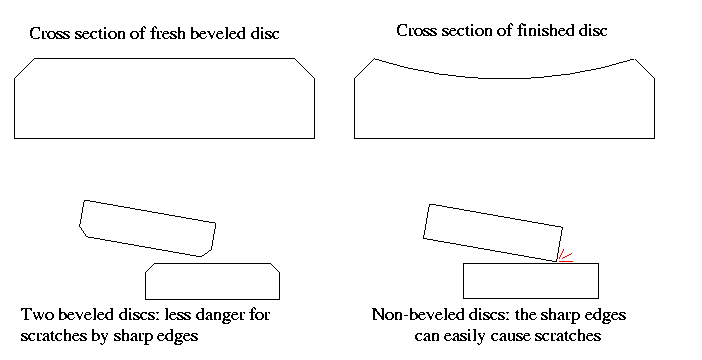
The borders of the discs were already bevelled, so I didn't have to do
that myself. Without bevelling, the edges of the discs would be too sharp
and could easily cause scratches, or break off chips of glass.

The grinding is done by fixating one disk, putting grinding power and water
upon it, and moving another disk atop of it. The fixed disk is the tool
and will become convex, and the upper disk, the mirror itself, will
become concave (hollow).
The whole idea of grinding powder is more or less the same as
grinding paper.
After a grinding a while (2 to 4 minutes), the powder/water mix dries up;
everything then has to be cleaned (wipe off the disks with a sponge),
and you add new water and powder. One such cycle is called a wet.


Grinding powders
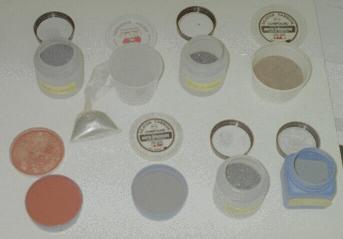
On the photograph you can see some grinding powders we found in a locker
in the workgroup astronomy's room. The powders are sold a.o. at
Optiek Van Grootven
and the VSRUG.
The size of the powder grains is expressed in `grit'. Bigger numbers indicate
finer powders: we start with 80 grit rough powder to do the rough grinding
and then continue with finer and finer powders up to something like 1000 grit.
Some examples of grit sequences used are:
80, 120, 220 and finally 500 grit
220, 320, 600, 800 and 1200
80, 120, 220, 320, 500, 12 or 15 micron, 5 or 8 micron
80, 120, 220, 320, 320, 25 micron, 12 micron, 9 micron
For bigger mirrors, 60 grit is often used as the first powder.
The powders are made by letting them pass through a sieve with a certain
number of holes per inch; that number is the grit number.
The finest powder sizes aren't expressed in grit but in microns
(so here, bigger numbers indicate coarser powders); for the fine touches
we use 9 micron powder (sometimes also 5 micron). A nice survey table
of powders and elutriative times in water can be found at
http://www.aegis1.demon.co.uk/abrasiv.htm
and http://www.newportglass.com/grit.htm.
I only started grinding itself a few weeks later (Friday evening 3-dec-1999);
you know how such things go :-)
We start with the so called rough grinding; the goal is to give
both disks a roughly spherical form. We use 80 grit powder to accomplish this.
Later, we grind the mirror smooth with finer and finer powders.
The first wet took about half an hour (yes indeed, 2 to 4 minutes
grinding and a lot of minutes looking up things in the documentation I
ripped off the net to see what exactly I had to do again). I got
the inspiration from
http://users.uniserve.com/~victorp/mirror.htm,
de ATM FAQ
and
Mel Bartels' pages.
Once you know the method, thinks work out a lot smoother; after grinding
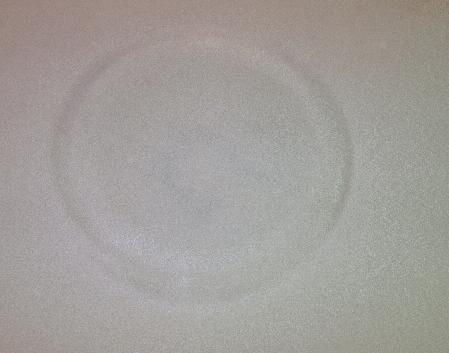
for another hour I called it a day, with this result:
 If this photo would have been better, you'd been able to see that
at the rim of the mirror there's still a ring of unpolished glass;
the rest of the disk has become opaque by the rough grinding powder.
This seems to be perfectly normal and nothing to worry about.
This is the method I use:
- Screw four bolts (nails would have done fine also) in a plank of wood,
so the tool just fits in between the bolts.
- Put the tool between the bolts. Put some pieces of cardboard between
toe bolts and the tool, so it is firmly in place.


The grinding setup before grinding
- For the rough grinding you need: some grit 80 grinding powder,
a plastic spoon to scoop up the powder (metal spoons are
not recommended because tiny bits of metal could come off
and cause scratches on the mirror), and a cup of (clean) water.
- A wet goes like this:
- Put some water on the tool.
- Put half a spoon of powder on the tool.
-
Put the mirror atop of the tool, and turn it a bit to mix
the powder and the water. When you turn around the mirror atop
of the tool and it keeps continuing to turn a bit, things are
more or less okay. Now move the mirror a bit to the right
(move about half of the diameter of the mirror) and move 10 to
15 times forward and backward with the mirror. While moving,
apply pressure to the disk. You should hear a loud sound.
One forward-and-backward move is called a stroke, and this
particular stroke is called a cordal stroke, because the
center of the upper disk moves along a cord of the lower one.
(A cord of a circle is a straight line starting and ending at that circle.)
Move about one time a second forward and backward.
The center of the upper disk may not pass the border of the
lower one (when your disk has concentric grooves like mine,
you can easily see where its center is).
It's important not to rotate the disk, so move only forward and
backward without turning the disk at the same time.
- Put the disks again centered above each other.
- Turn the plank 90 degrees to the right, so both disks will turn.
You shouldn't turn every time exactly 90 degrees, because then
you will move forward and backward only at the four same pieces of tool
over and over again. I turn always a little more than 90 degrees.

- Now turn the mirror again about 90 degrees to the right.
Here also, don't turn exactly 90 degrees, so in time each piece
of the mirror has moved over each piece of the tool. When we make
sure this happens, we have to end up with a spherical surface,
because there's only one kind of surface that fits nicely into each other
when you move two of them against each other: spheres.
 Of course, you can turn the plank and the mirror to the left each time;
the only thing to look for is that you always keep turning in the
same direction.
- Move the mirror again forward and backward 10 to 15 times, etcetera.
After 2 to 4 minutes the mix has become too dry, or too much of it
has gone over the edge of the disk, and the loud sound disappears.
Then it's time to clean up the powder (I use a roll of kitchen paper,
but as I seem to need an awful lot of it, the purchase of a
sponge is imminent :-) ) and start another wet.
- After one to two hours of grinding it's best to have a look how far
you have come already.


The grinding setup after two hours of grinding
I know of two methods to test this. The first is to use a
spherometer
(more info also at
http://members.aol.com/drowesmi/sphero.html)
or something alike to measure directly how deeply the mirror is grinded.
The depth of the mirror at the center is called the sagitta.
Another important dimension is the radius of curvature of the mirror,
which is the radius of the sphere the mirror surface is a part of.
The formula is
sagitta = radius of curvature - square root(radius of curvature2 - diameter2/4)
For small spherical mirrors, the radius of curvature is twice the focal length,
in our case 2x120cm = 240cm. Filling in everything in the formula gives:
sagitta = 240cm - square root(2402 - 152/4)cm
sagitta = 240cm - square root(57600 - 225/4)cm
sagitta = 240cm - 239,8828cm
sagitta = 0,1172cm
So the sagitta is 1,172 mm.
Another method is to measure the focal length by wetting the mirror
(so it reflects light well) and to light it from a long distance
(or put it in the sun) and search the focus by moving forwards
and backwards while looking at the projected image at a piece of
cardboard, until the image is sharp. The distance from the mirror
to the cardboard is the focal length.
I also put a tube (well, a piece of paper I roll up and tape together
actually) behind the lamp to avoid that the lights shines in all
directions and almost blinds me while I'm running to and fro with
the cardboard and mirror :-)
Mind you: a wet mirror has a strong tendency to slip out of your hands :-)
Instead of a plank which you rotate, you can also use a fixed grinding stand
around which you walk. You can find plans for such
a stand on the net.
On Monday evening 6-dec-1999 I did the second grinding session.
After two hours of grinding, the mirror has become everywhere opaque:
the transparent rim of before has vanished, probably because now I paid
more attention not to rotate the mirror while grinding. The focal length
is still above three meters.
Wednesday evening 8-dec-1999: another hour of grinding.
Focal length is 2m30.
Thursday evening 9 december: our supply of grit 80 powder is exhausted, so
I switch to 120. For 15cm disks it is
not unusual
to start with 120 powder instead of 80. With 80 grit powder you could
make not enough strokes, causing an unequally curved mirror.
With 120 grit, the process goes slower but more uniformly.
After grinding an hour with this 120 powder, the focal length
is 1m20, so exactly where we'd like to get (hurray!). The rough grinding
ends here.
(Historical note: mind you: if you are grinding
a mirror yourself using this story as an information source: first
continue reading till 19 january 2000! It turned out I missed a few
things ... but I warned you beforehand,
didn't I? :-) )
Total grinding time is (for those of you who have paid a lot of
attention) 5h30.
Copyright © 2000 Geert Vernaeve
[ Back |
Fine grinding |
Polishing ]


